# Installation
- [Install Wave](#install-wave)
- [Create a New Repo](#create-repo)
- [Deploy to DigitalOcean](#deploy-to-digitalocean)
- [Logging into Your Application](#login)
---
## Install Wave
Before installing wave you will need to make sure you have the minimum server requirements and then you'll want to clone the repo to your machine.
### Clone the Repo
You can clone the repo onto your local machine with the following command:
```
git clone https://github.com/thedevdojo/wave.git project_name
```
Change `project_name` with the name of your project. Optionally, you may want to create a [new Github Repo for your project](#create-repo).
---
Ok, now we can easily install Wave with these **4 simple steps**:
### 1. Create a New Database
During the installation we need to use a MySQL database. You will need to create a new database and save the credentials for the next step.
### 2. Copy the `.env.example` file
We need to specify our Environment variables for our application. You will see a file named `.env.example`, you will need to duplicate that file and rename it to `.env`.
Then, open up the `.env` file and update your *DB_DATABASE*, *DB_USERNAME*, and *DB_PASSWORD* in the appropriate fields. You will also want to update the *APP_URL* to the URL of your application.
```bash
APP_URL=http://wave.test
DB_CONNECTION=mysql
DB_HOST=127.0.0.1
DB_PORT=3306
DB_DATABASE=wave
DB_USERNAME=root
DB_PASSWORD=
```
### 3. Add Composer Dependencies
Next, we will need to install all our composer dependencies by running the following command:
```php
composer install
```
### 4. Run Migrations and Seeds
We need to migrate our database structure into our database, which we can do by running:
```php
php artisan migrate
```
Finally, we will need to seed our database with the following command:
```php
php artisan db:seed
```
🎉 And that's it! You will now be able to visit your URL and see your Wave application up and running.
> For security measures you may want to regenerate your application key, be sure to run the following command below to secure your site before going live.
```php
php artisan key:generate
```
---
## Create a New Repo
In most cases it's a good idea to create a separate repo for your new project. This will also make it easier to [deploy our application to DigitalOcean](#deploy-to-do).
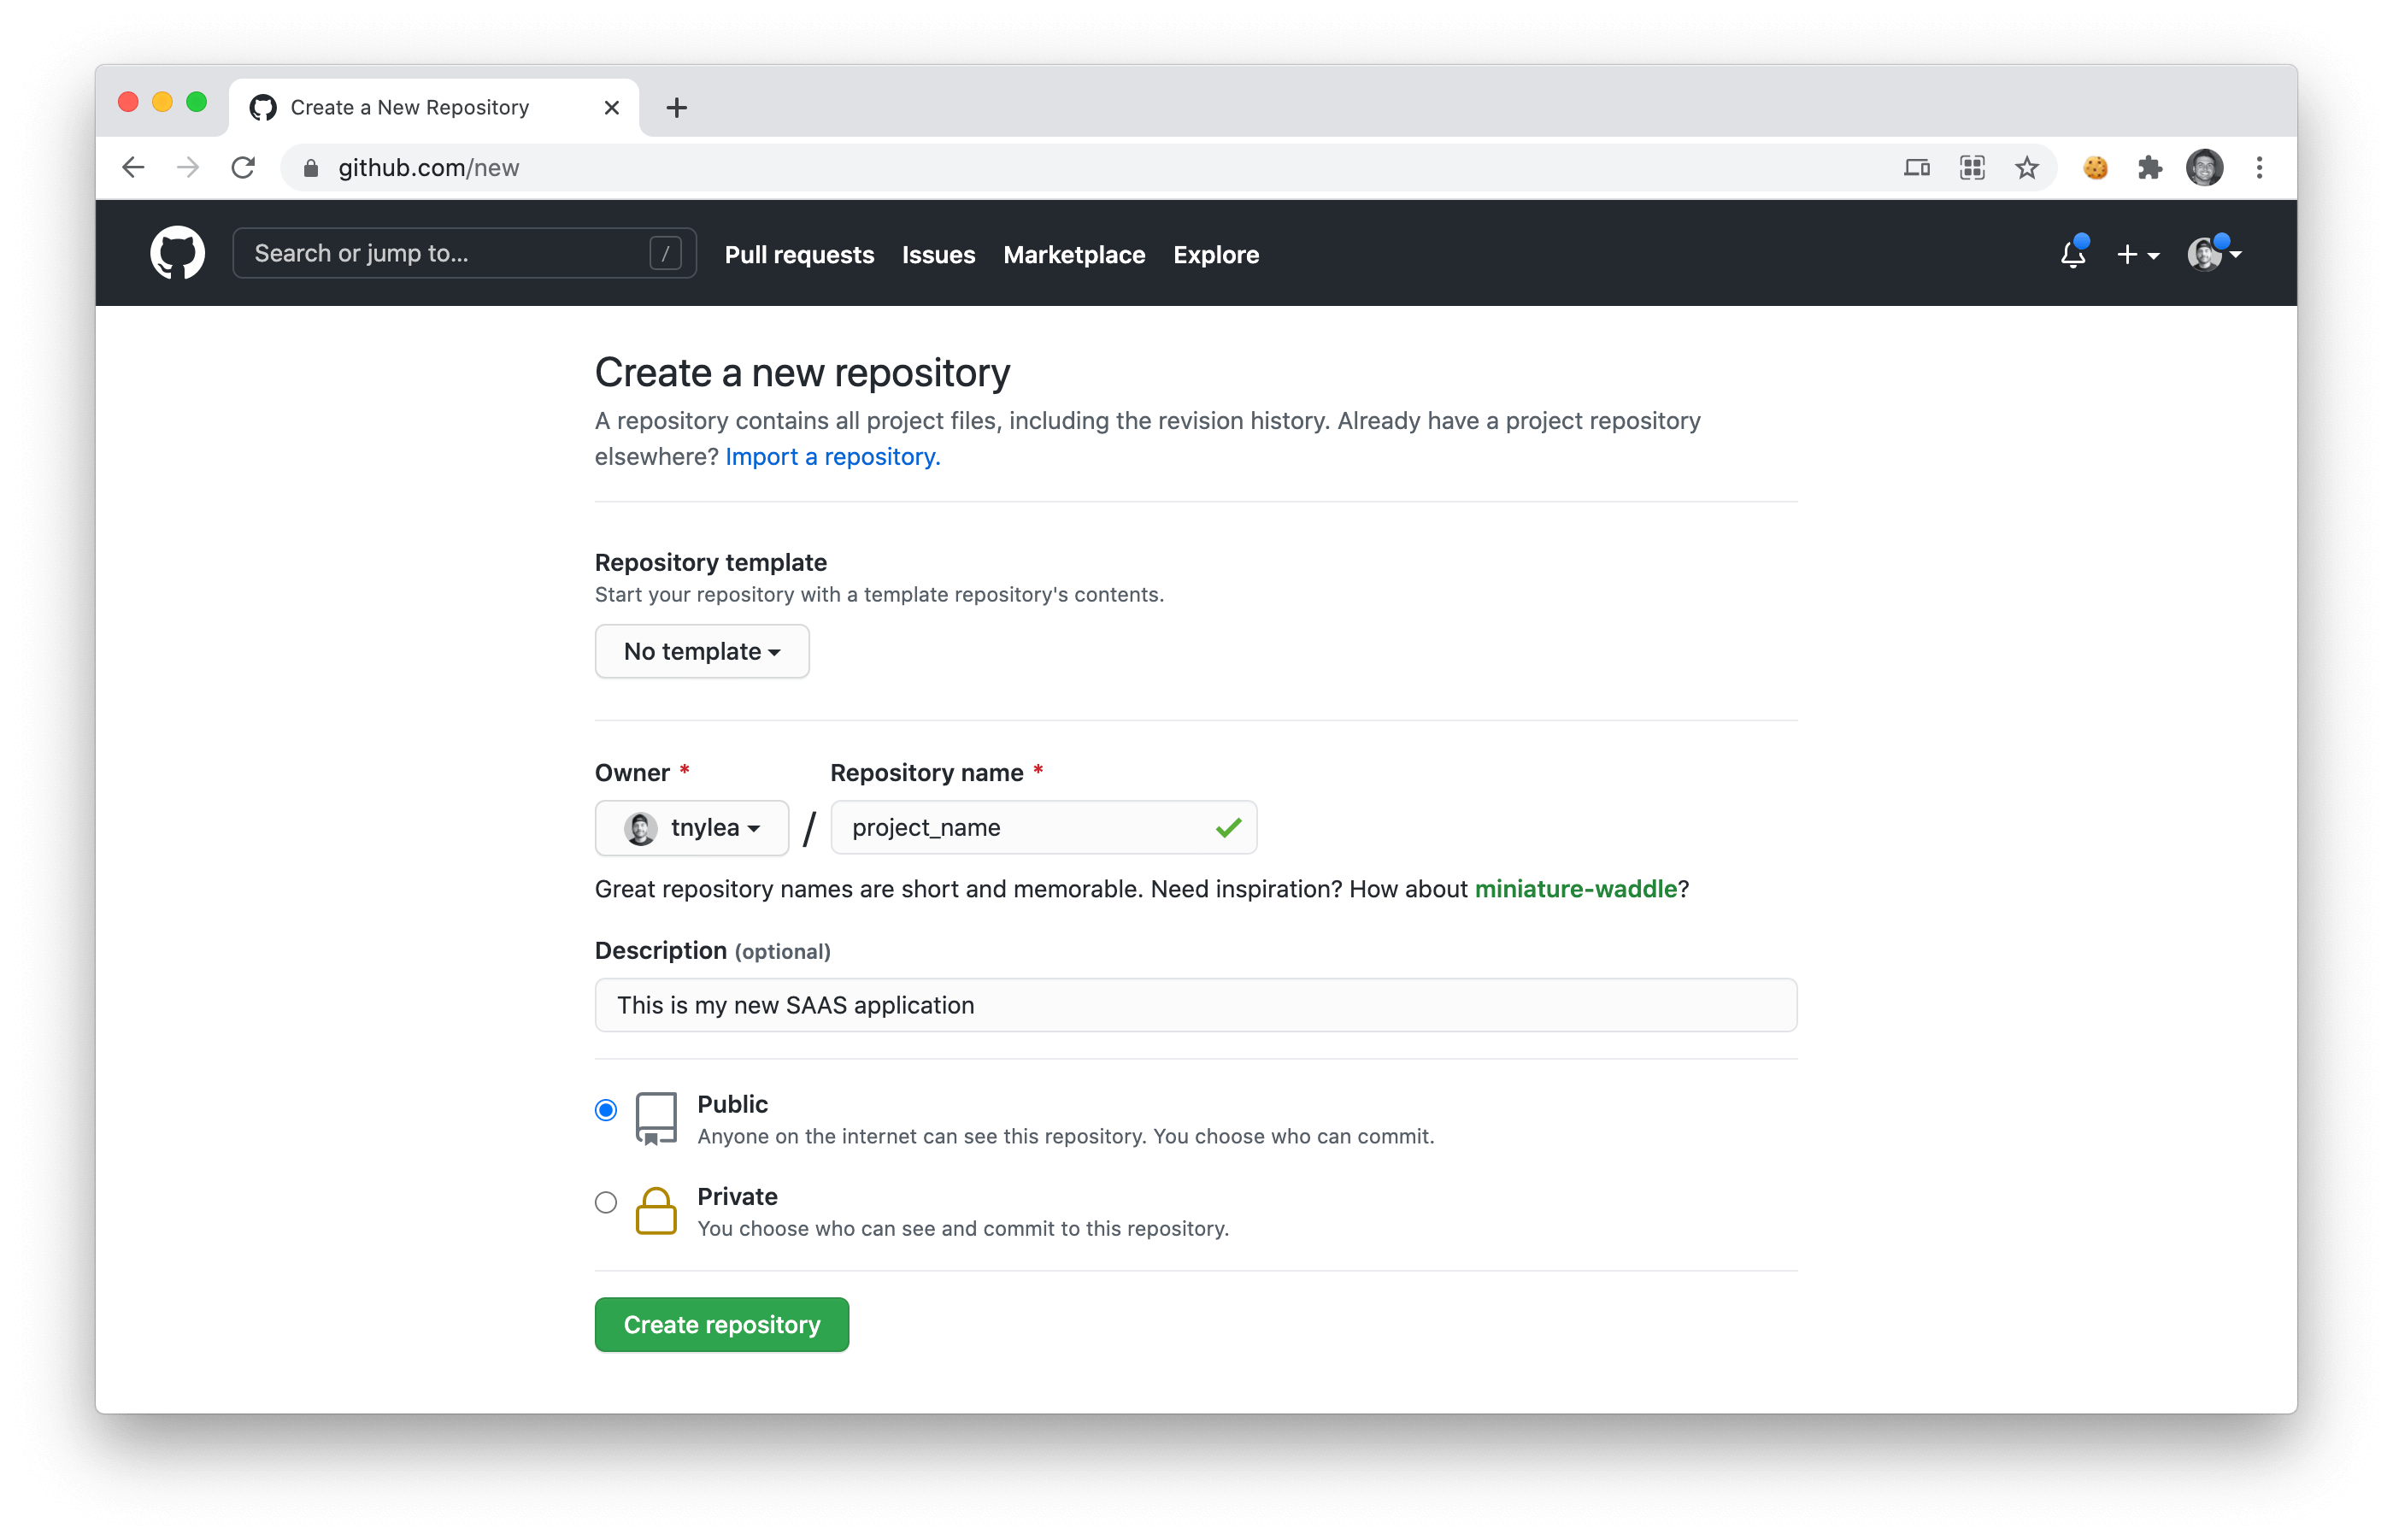
If you are logged into your Github account, you can go to https://github.com/new to create a new repository. Give it a name associated with your SAAS and click **Create Repository**
After you click on create repo, you will need to open up the command line and `cd` into your `project_name` folder and run the following commands, replacing `tnylea/project_name` with the name of your repo:
```
rm -rf .git/
git init
git add --all
git commit -m "first commit for my SAAS"
git branch -M main
git remote add origin https://github.com/tnylea/project_name.git
git push -u origin main
```
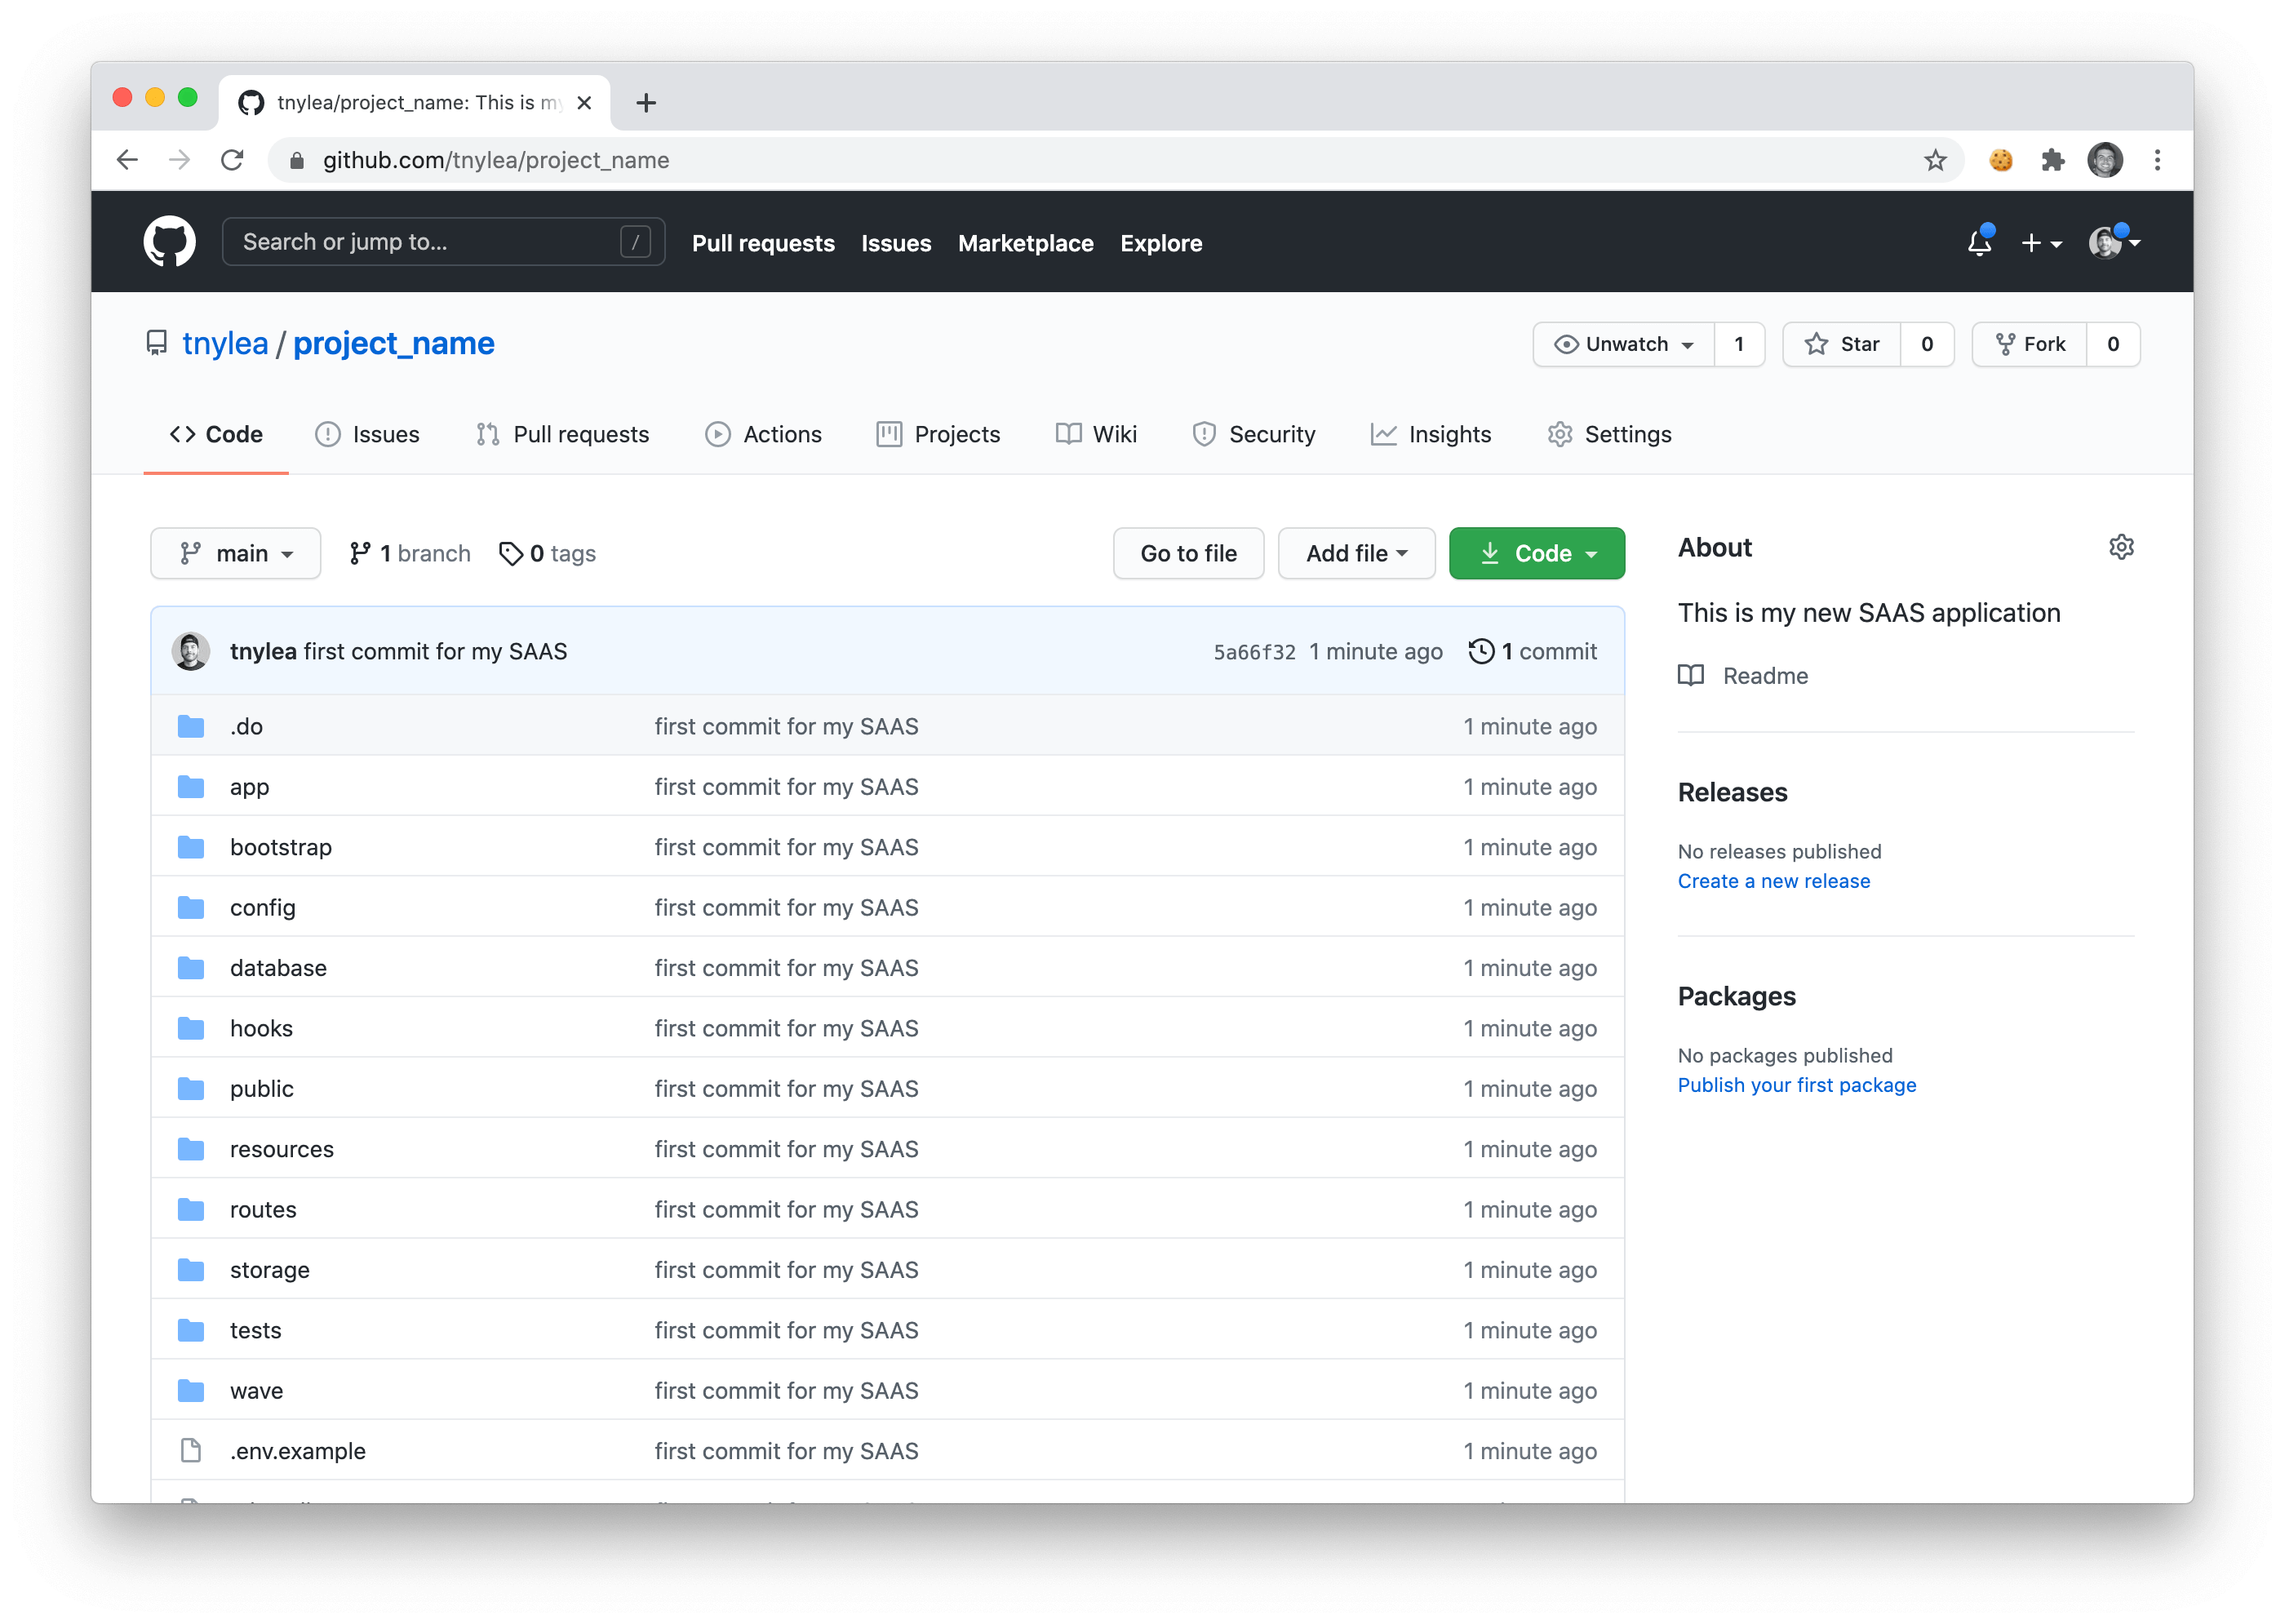
If you refresh your Github Repository you should see that it now contains the files for your new SAAS application.
---
## Deploy to Digital Ocean

If you use Digital Ocean, you're in luck. You can easily start surfing the Wave(s) on DigitalOcean with our DO App Platform integration. Not using DigitalOcean? Get $100 in free DigitalOcean credit here. 💵
Here are 3 simple steps to get started with your new SAAS on Digital Ocean.
1. [🔑 Get Your DO API Key](#api-key)
2. [🚀 Deploy Your App](#deploy-app)
3. [🤓 Start Building Your SAAS](#start-building)
---
### 1. 🔑 Get Your DO API Key
In order to deploy to DigitalOcean you'll need to get your API Key from the following URL: [https://cloud.digitalocean.com/account/api/tokens](https://cloud.digitalocean.com/account/api/tokens)
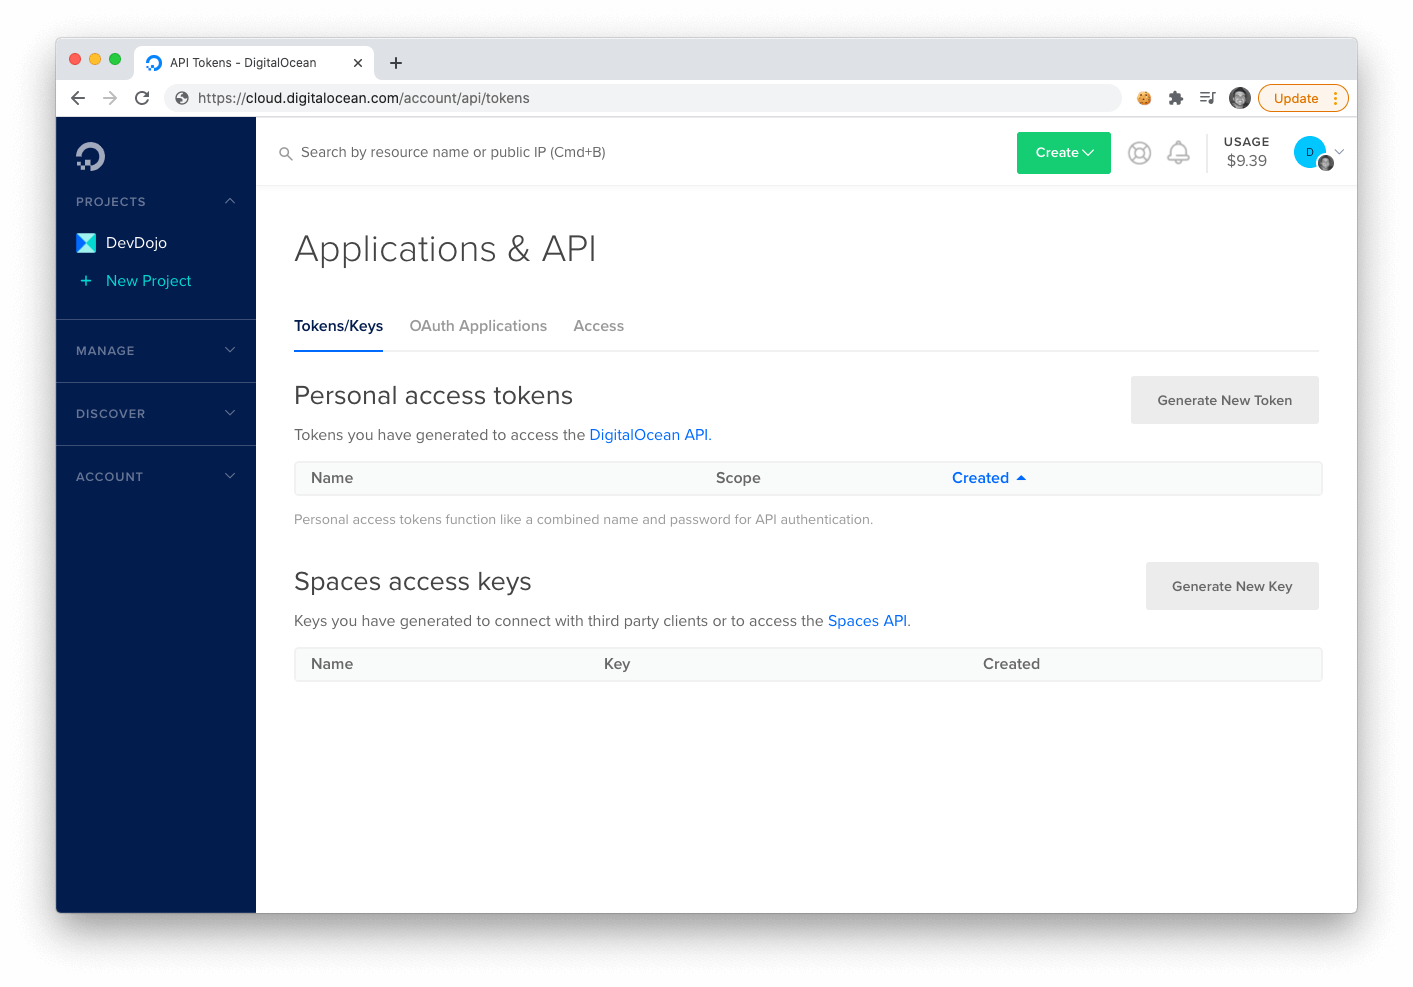
Click on the **Generate New Token**, button and save your new token for the next step.
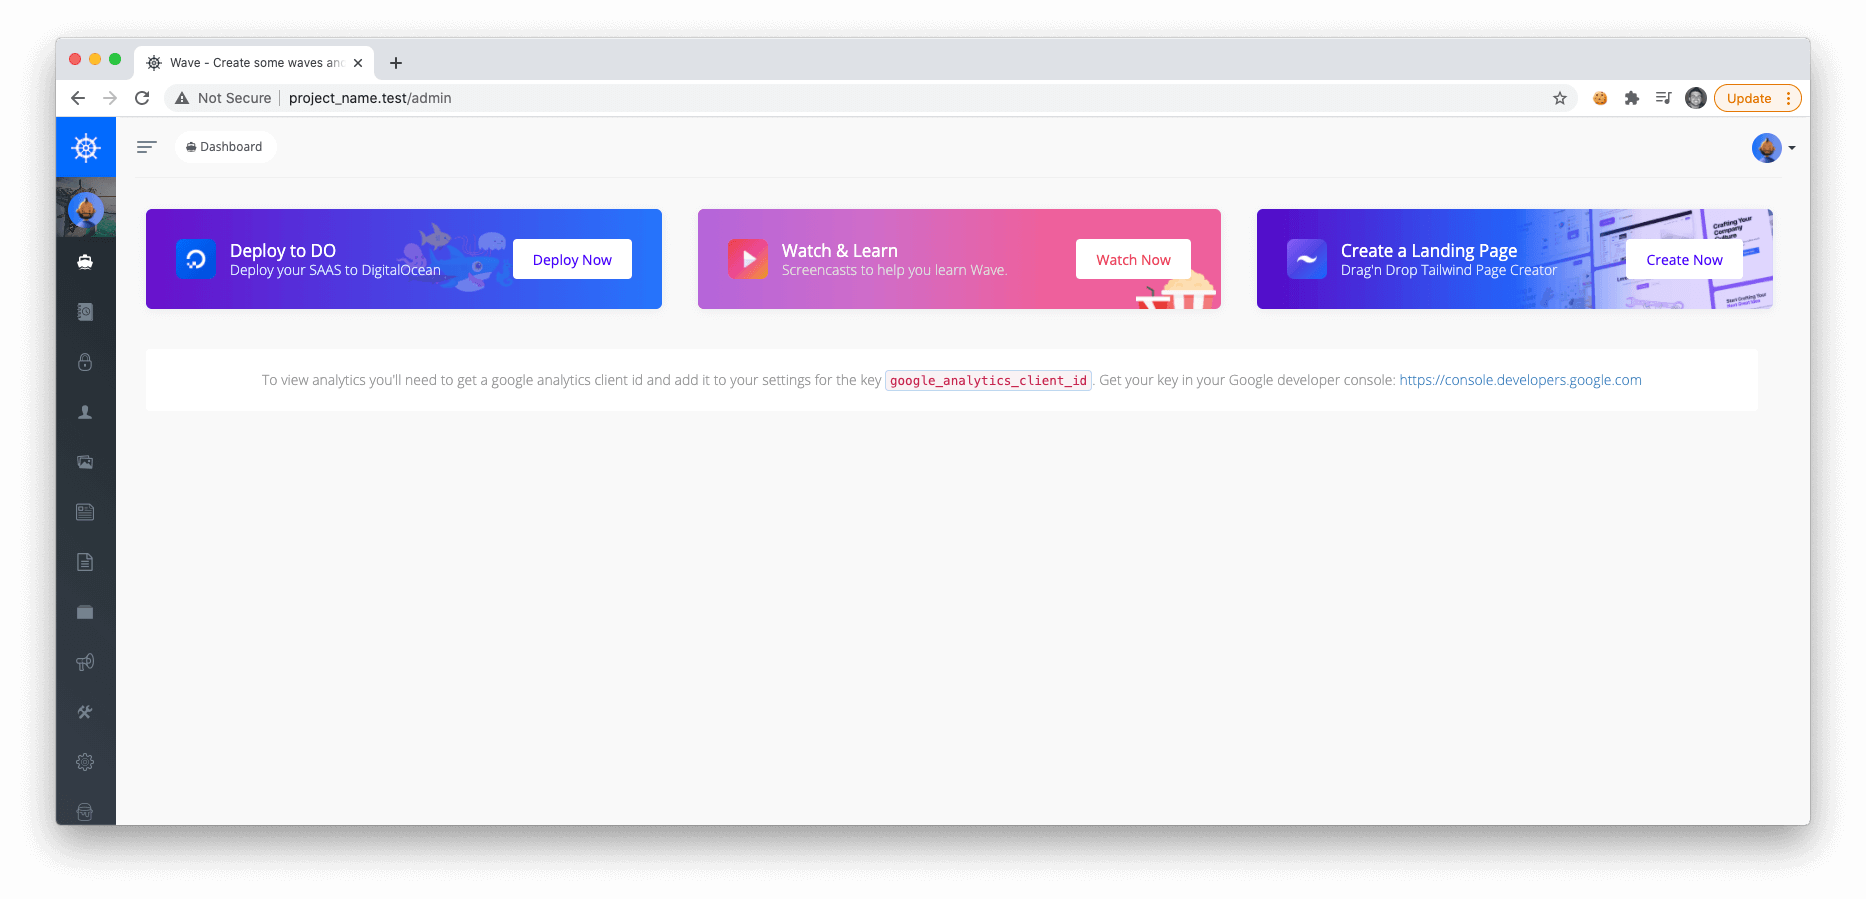
### 2. 🚀 Deploy Your App
Ok, now you're ready to deploy your application to DigitalOcean. Login to your application admin and click on the **Deploy Now** button in the first card:
Next, you'll see another page where you need to enter in your **repo**, **give DO access to your Repo**, and then enter in your **api key**.
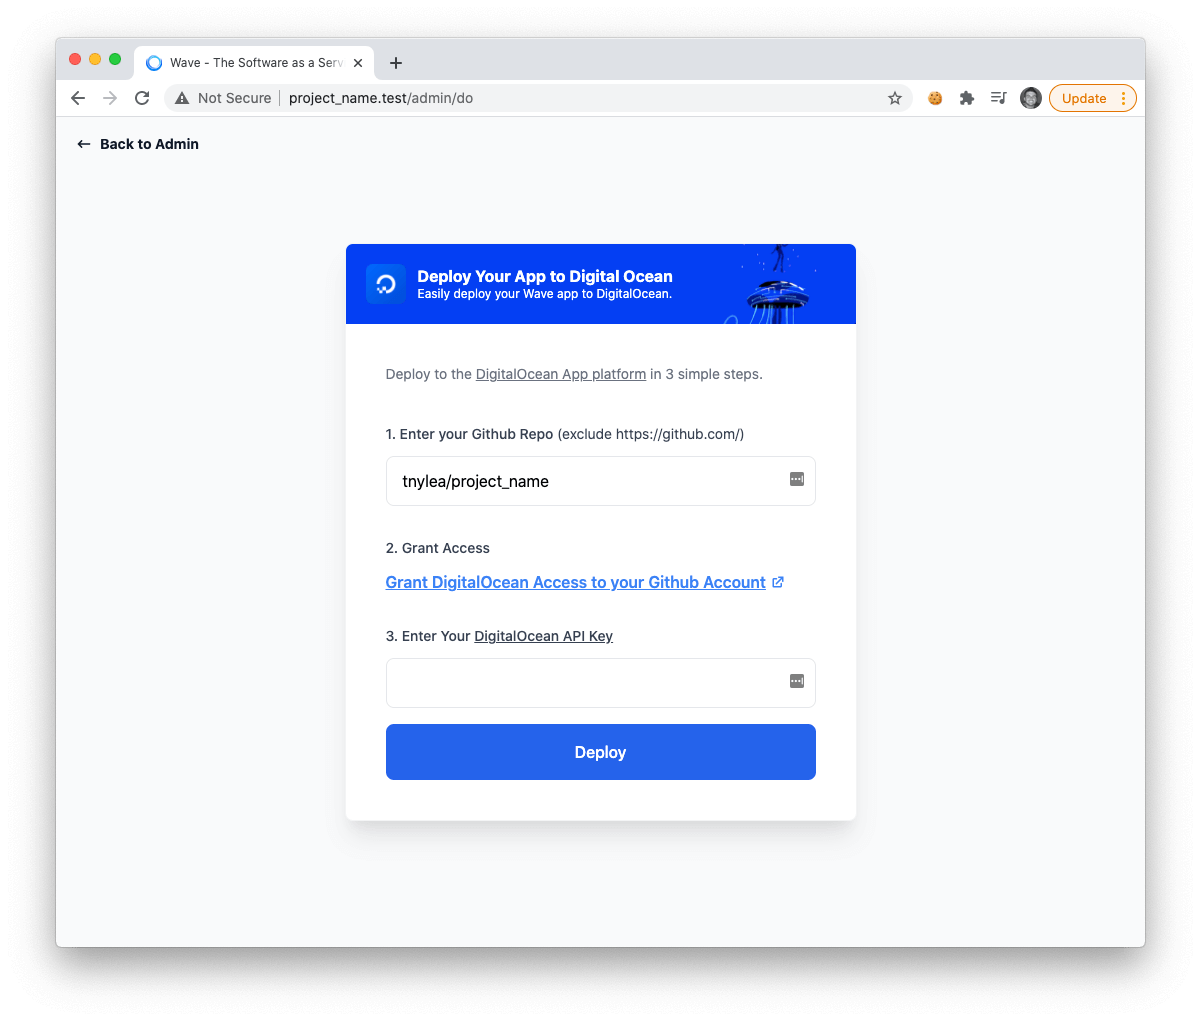
After you enter those fields and press deploy, you will see a success message. Now you can navigate to your digital ocean app platform dashboard and you'll see your new application.
### 3. 🤓 Start Building Your SAAS
That's it! You are now ready to start building your SAAS and deploy it to DigitalOcean.
---
If you want to learn more about setting up Wave and support the ongoing development of Wave you may want to consider becoming a DevDojo Pro user. Together we can make this project even more awesome 😎
## Logging into your Application
After installing Wave you can login with the following default credentials:
- **email**: admin@admin.com
- **password**: password
After logging in you can feel free to change the admin email, username, and password by visiting the settings section in the user menu.