148 lines
6.5 KiB
Markdown
148 lines
6.5 KiB
Markdown
# API
|
|
|
|
Wave comes with an out-of-the-box API, which will allow you to provide an API to your users or build a mobile app from your API.
|
|
|
|
In this section we will go into more depth on how you can use the Wave API.
|
|
|
|
- [Access API Data](#access-data)
|
|
- [Access Token From API Key](#access-token-from-api-key)
|
|
- [Access Token from Login](#acess-token-from-login)
|
|
- [Requesting Data from Tokens](#request-data-from-token)
|
|
- [Testing Your API](#testing-api)
|
|
- [Registering via the API](#registering-via-api)
|
|
|
|
---
|
|
|
|
<a name="access-data"></a>
|
|
### Access Data from the API
|
|
|
|
In order to access data from the API a user or an application will need to pass an **Access Token** to the API. This access token will determine what kind of data can be accessed or returned.
|
|
|
|
There are 2 ways to get an Access Token:
|
|
|
|
1. You can request an **Access Token** from an API key.
|
|
2. You can request an **Access Token** with an email and password.
|
|
|
|
<a name="access-token-from-api-key"></a>
|
|
### Get Access Token from an API Key
|
|
|
|
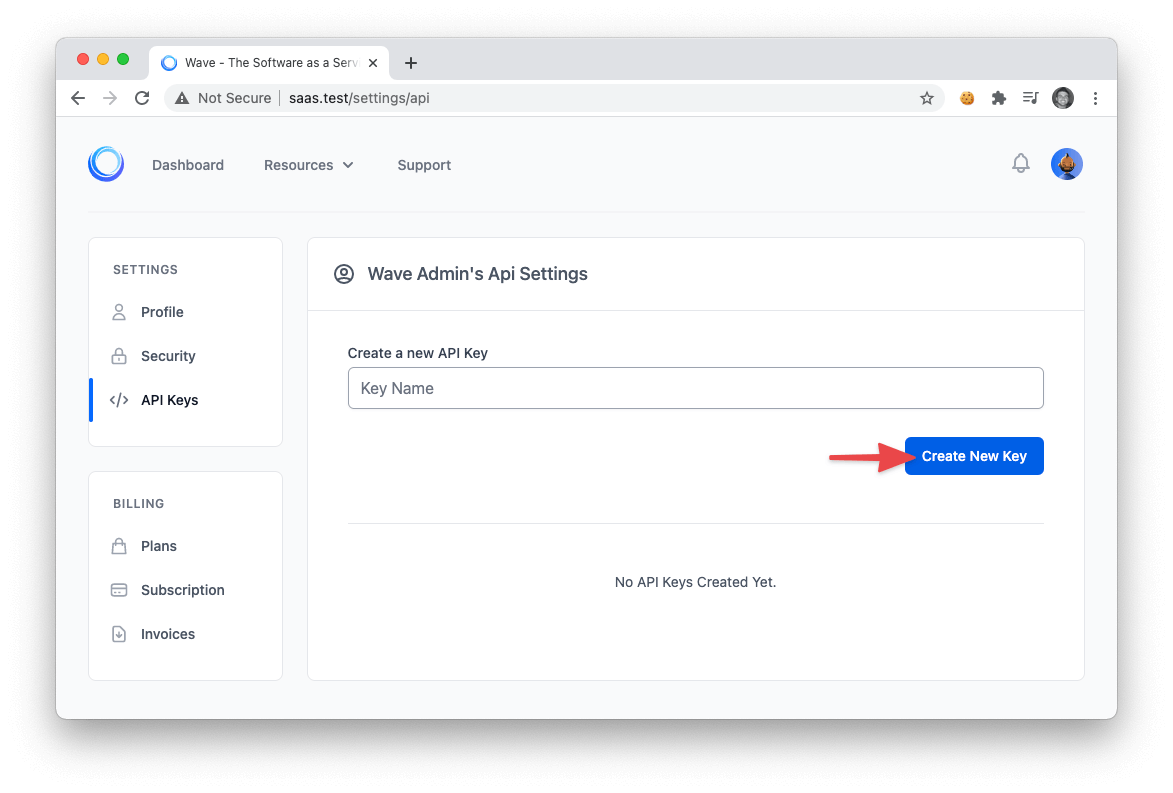
To create an API key you can visit your API settings page at: `/settings/api`, then to create a new API key, enter a name in the textbox and click on the `Create New Key` button.
|
|
|
|
|
|
|
|
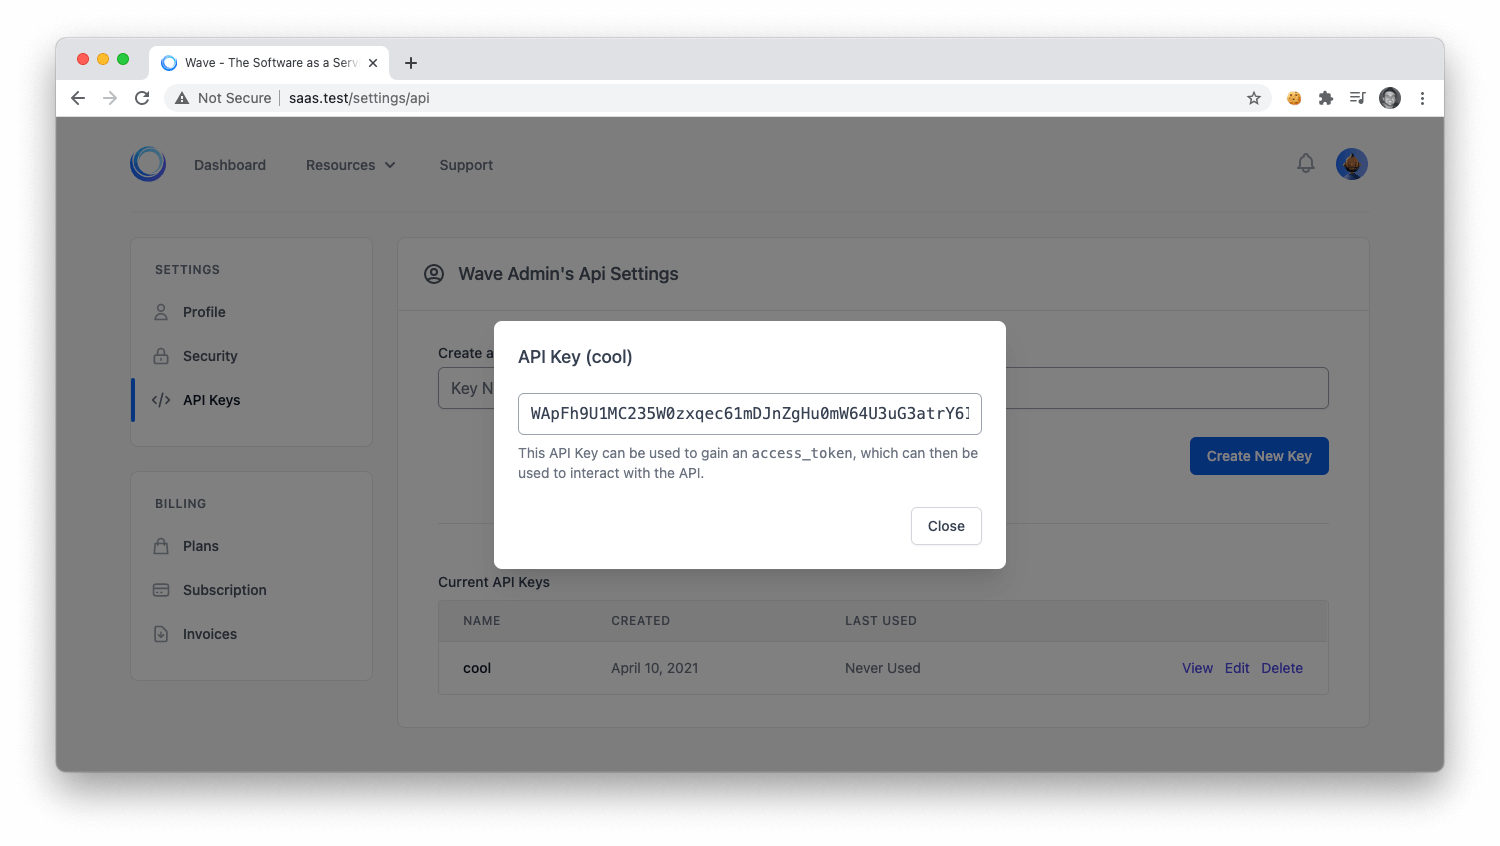
After creating your new API key you will see it in the list of *Current API Keys*. You'll be able to see the Name, Date Created, and the Last Used. There are also 3 actions you can do with this new API Key. To view the current API Key. Click on the `View` button:
|
|
|
|

|
|
|
|
And you will see the current API key where you can copy and paste it to be used.
|
|
|
|
|
|
|
|
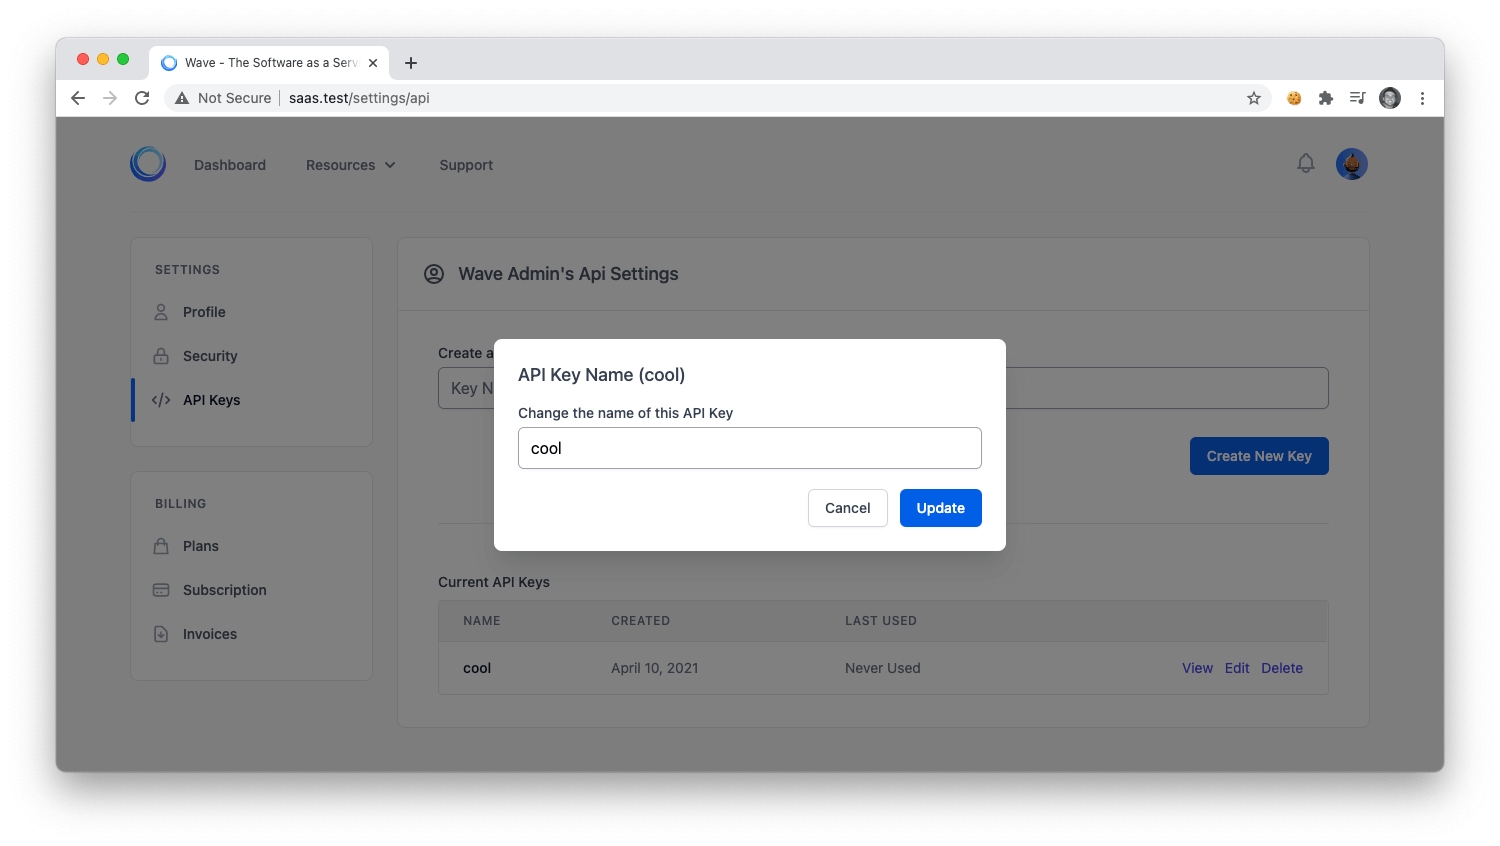
Next, you can click on the `Edit` button:
|
|
|
|

|
|
|
|
Where you will be able to edit the current API key name.
|
|
|
|
|
|
|
|
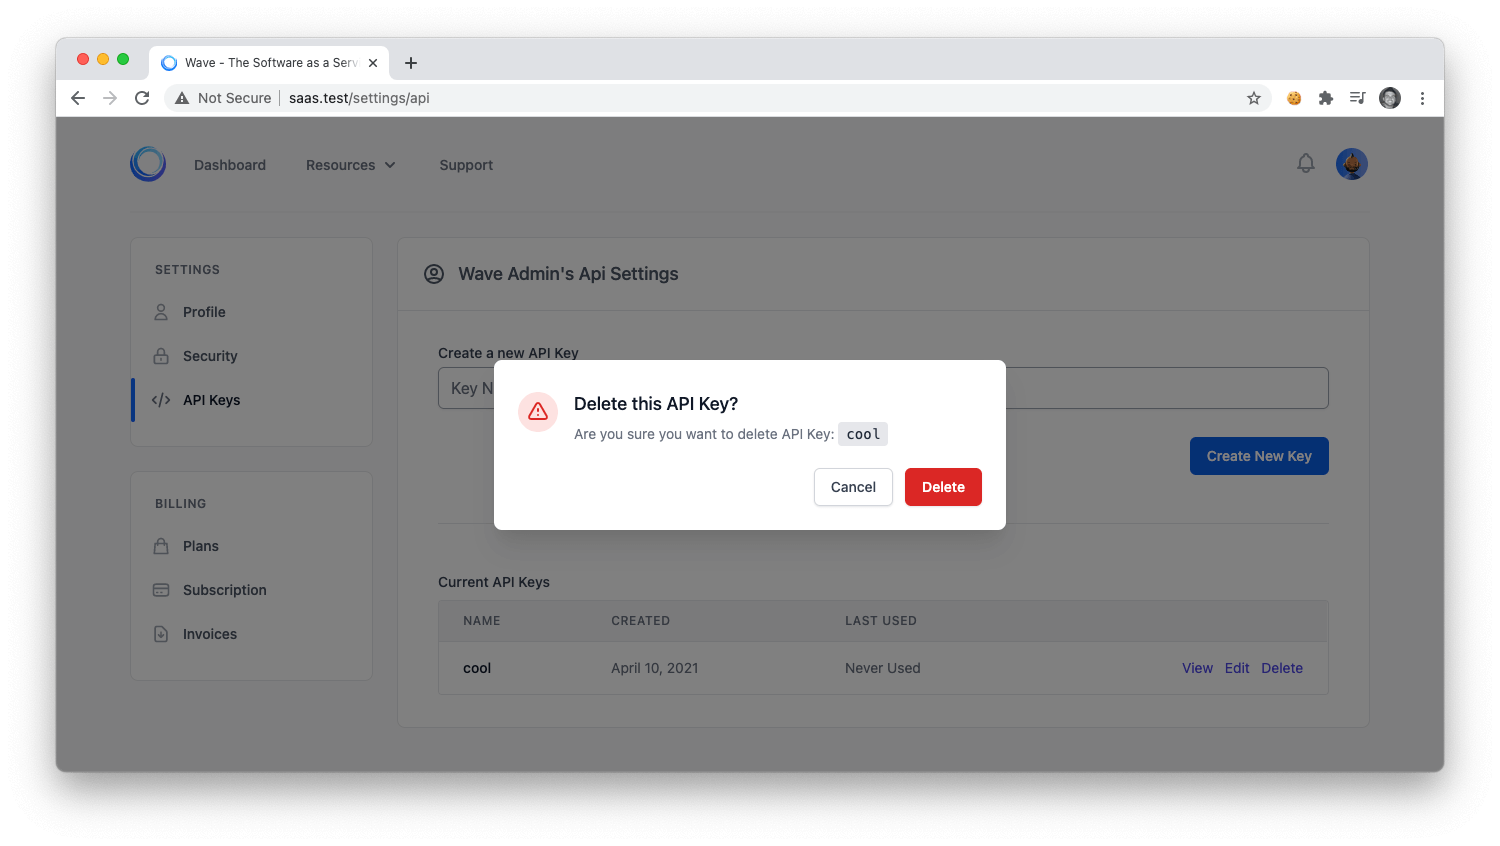
Lastly, if you click on the delete button:
|
|
|
|

|
|
|
|
You will be able to delete the current API key.
|
|
|
|
|
|
|
|
Next, let's move on to learning how you can use this API key to request an **Access Token** from the API. After we recieve the **Access Token** we can then use that to retrieve data from our application.
|
|
|
|
To request an **Access Token** we can submit a POST request to:
|
|
|
|
```php
|
|
/api/token?key=API_KEY_HERE
|
|
```
|
|
|
|
And you will get a response that looks similar to the following:
|
|
|
|
```json
|
|
{
|
|
"access_token": "eyJ0eXAiOiJKV1QiLCJhbGciOiJIUzI1NiJ9.eyJpc3MiOiJodHRwOlwvXC93YXZlLnRlc3RcL2FwaVwvdG9rZW4iLCJpYXQiOjE1Mzk4MDg4OTUsImV4cCI6MTUzOTgxMjQ5NSwibmJmIjoxNTM5ODA4ODk1LCJqdGkiOiJRdTViYnhwdlBkNE9tT3ZZIiwic3ViIjoyLCJwcnYiOiI4N2UwYWYxZWY5ZmQxNTgxMmZkZWM5NzE1M2ExNGUwYjA0NzU0NmFhIn0.AJNTXTlnI74ZyPw2rqvEaI7P5YPaLnZNWcCBBmRX0W0"
|
|
}
|
|
```
|
|
|
|
This is the **Access Token** we will use to retrieve data in our application. We'll show you how to use this Access Token in the next few steps.
|
|
|
|
<a name="acess-token-from-login"></a>
|
|
## Get Access Token from Login
|
|
|
|
To get an **Access Token** from a User Login you can do a POST request to:
|
|
|
|
```php
|
|
/api/login?email=admin@admin.com&password=password
|
|
```
|
|
|
|
And you will get a similar response to the response above:
|
|
|
|
```json
|
|
{
|
|
"access_token": "eyJ0eXAiOiJKV1QiLCJhbGciOiJIUzI1NiJ9.eyJpc3MiOiJodHRwOlwvXC93YXZlLnRlc3RcL2FwaVwvbG9naW4iLCJpYXQiOjE1Mzk4MTE0NjUsImV4cCI6MTUzOTgxNTA2NSwibmJmIjoxNTM5ODExNDY1LCJqdGkiOiJKRWljOGdTWFp4S0VjaWh1Iiwic3ViIjoxLCJwcnYiOiI4N2UwYWYxZWY5ZmQxNTgxMmZkZWM5NzE1M2ExNGUwYjA0NzU0NmFhIn0._1oFRK-zeUKMpvCcg8kmM86avzzmI--yQnI4KRwYk1k",
|
|
"token_type": "bearer",
|
|
"expires_in": 60
|
|
}
|
|
```
|
|
|
|
You'll see that this response includes 2 more fields the **token_type** and the **expires_in**. When your application detects the access token has expired it will need request a new access token with the following API request:
|
|
|
|
| METHOD | URI | Bearer TOKEN |
|
|
|:-|:-|:-|
|
|
| POST | `/api/refresh` | Bearer: eyJ0e... |
|
|
|
|
And you will recieve a new **Access Token** for your application to be used. This expiration and refresh tokens are common for keeping your API secure.
|
|
|
|
<a name="request-data-from-token"></a>
|
|
### Request Data with an Access Token
|
|
|
|
Now, that you have an Access Token you can request data from the application using that token. Based on the permission of the current user they will be able to **B**rowse, **R**ead, **E**dit, **A**dd, and **D**elete any content in your application.
|
|
|
|
Take the blog **posts** for instance, a user can retrieve data using the following restful routes:
|
|
|
|
| TYPE | METHOD | URI | Bearer TOKEN |
|
|
|:-|:-|:-|:-|
|
|
| JSON | GET (Browse) | `/api/posts` | Bearer: eyJ0e... |
|
|
| JSON | GET (Read) | `/api/posts/{id}` | Bearer: eyJ0e... |
|
|
| JSON | PUT (Edit) | `/api/posts/{id}` | Bearer: eyJ0e... |
|
|
| JSON | POST (Add) | `/api/posts` | Bearer: eyJ0e... |
|
|
| JSON | DELETE (Delete) | `/api/posts` | Bearer: eyJ0e... |
|
|
|
|
In the PUT and POST methods above you can pass JSON data to Edit or Add content.
|
|
|
|
<a name="testing-api"></a>
|
|
### Testing Your API
|
|
|
|
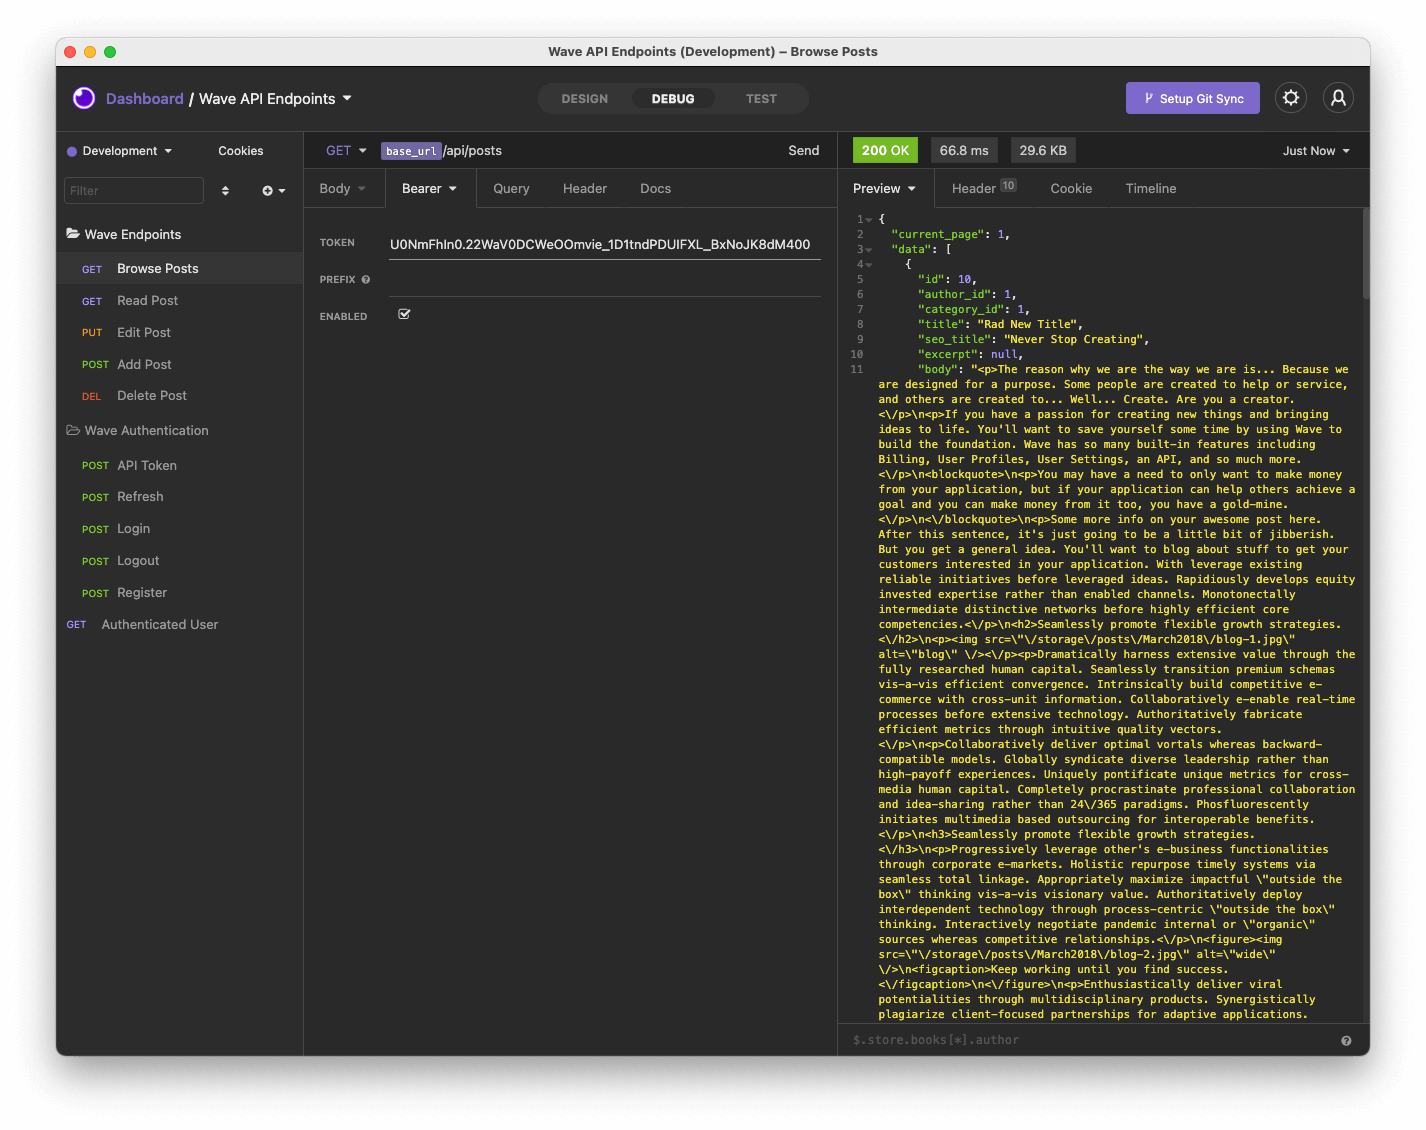
You can test out your application by using a third-party tool called <a href="https://insomnia.rest/" target="_blank">Insomnia</a>, this is a free app that you can download and you can view all the endpoints on the left and the API data on the right.
|
|
|
|
|
|
|
|
In order to download the End Points for the Wave application you can find this file located here: [https://github.com/thedevdojo/laravel-wave-api-endpoints](https://github.com/thedevdojo/laravel-wave-api-endpoints), this page also shows instructions on how to import the current endpoints.
|
|
|
|
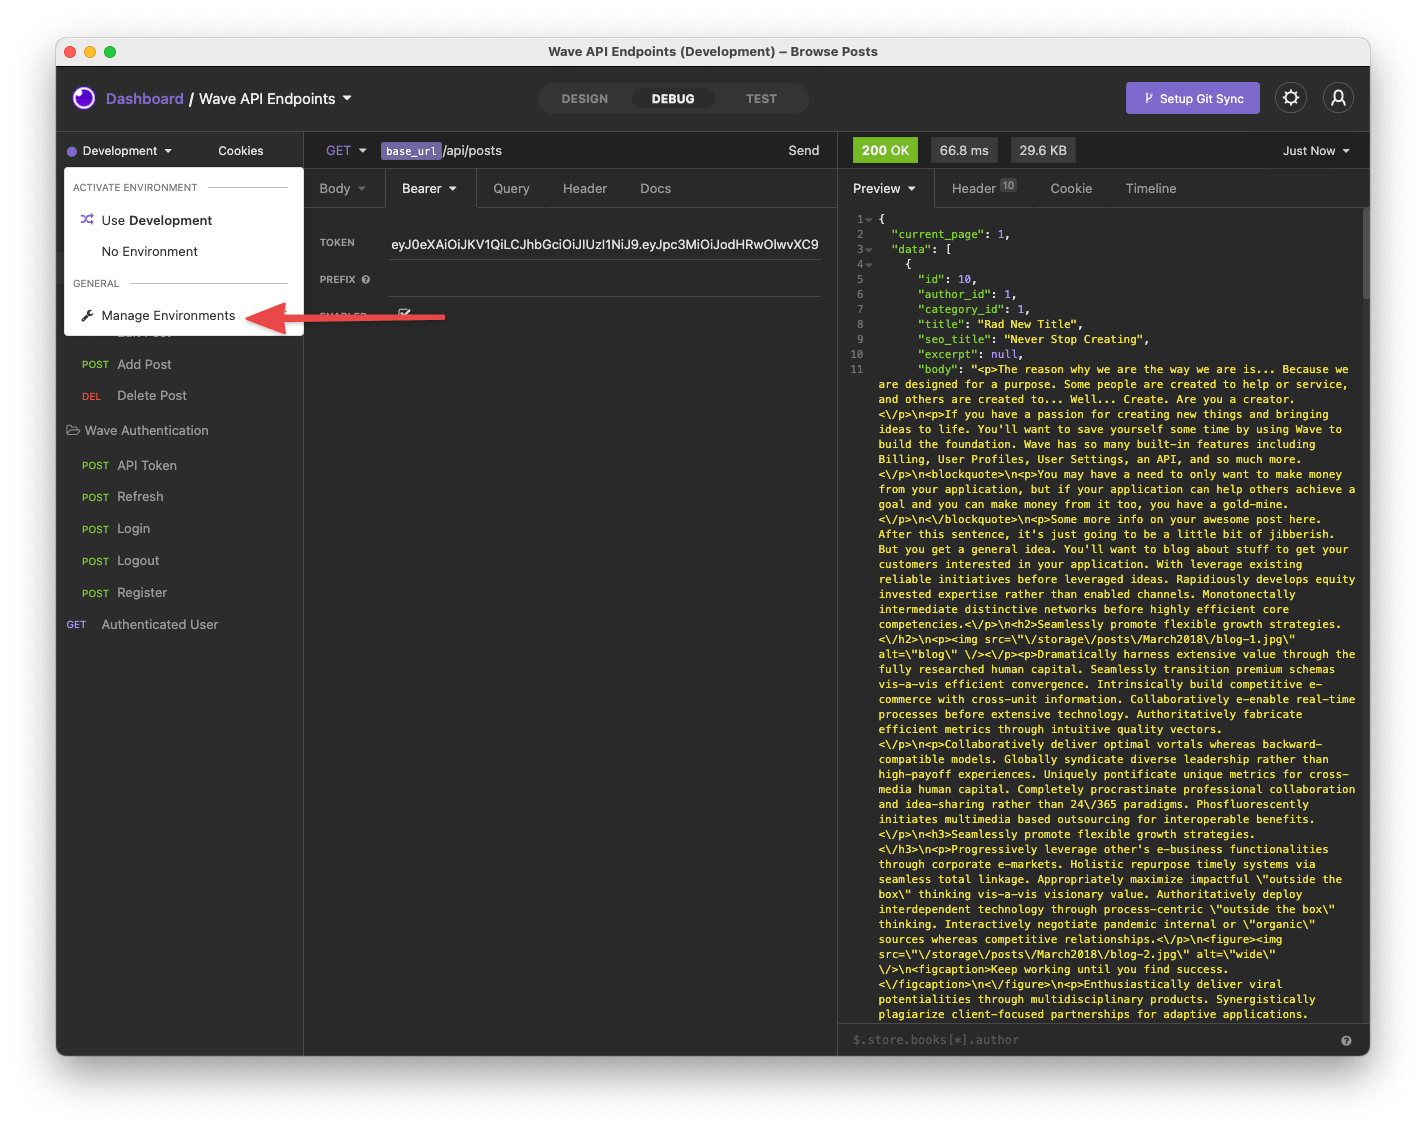
After you have imported the API endpoints, you may also wish to change the BASE_URL variable in the application. We use `https://wave.test` for testing, but your local URL may be different. To do this, you'll need to click on **Development->Manage Environments**
|
|
|
|
|
|
|
|
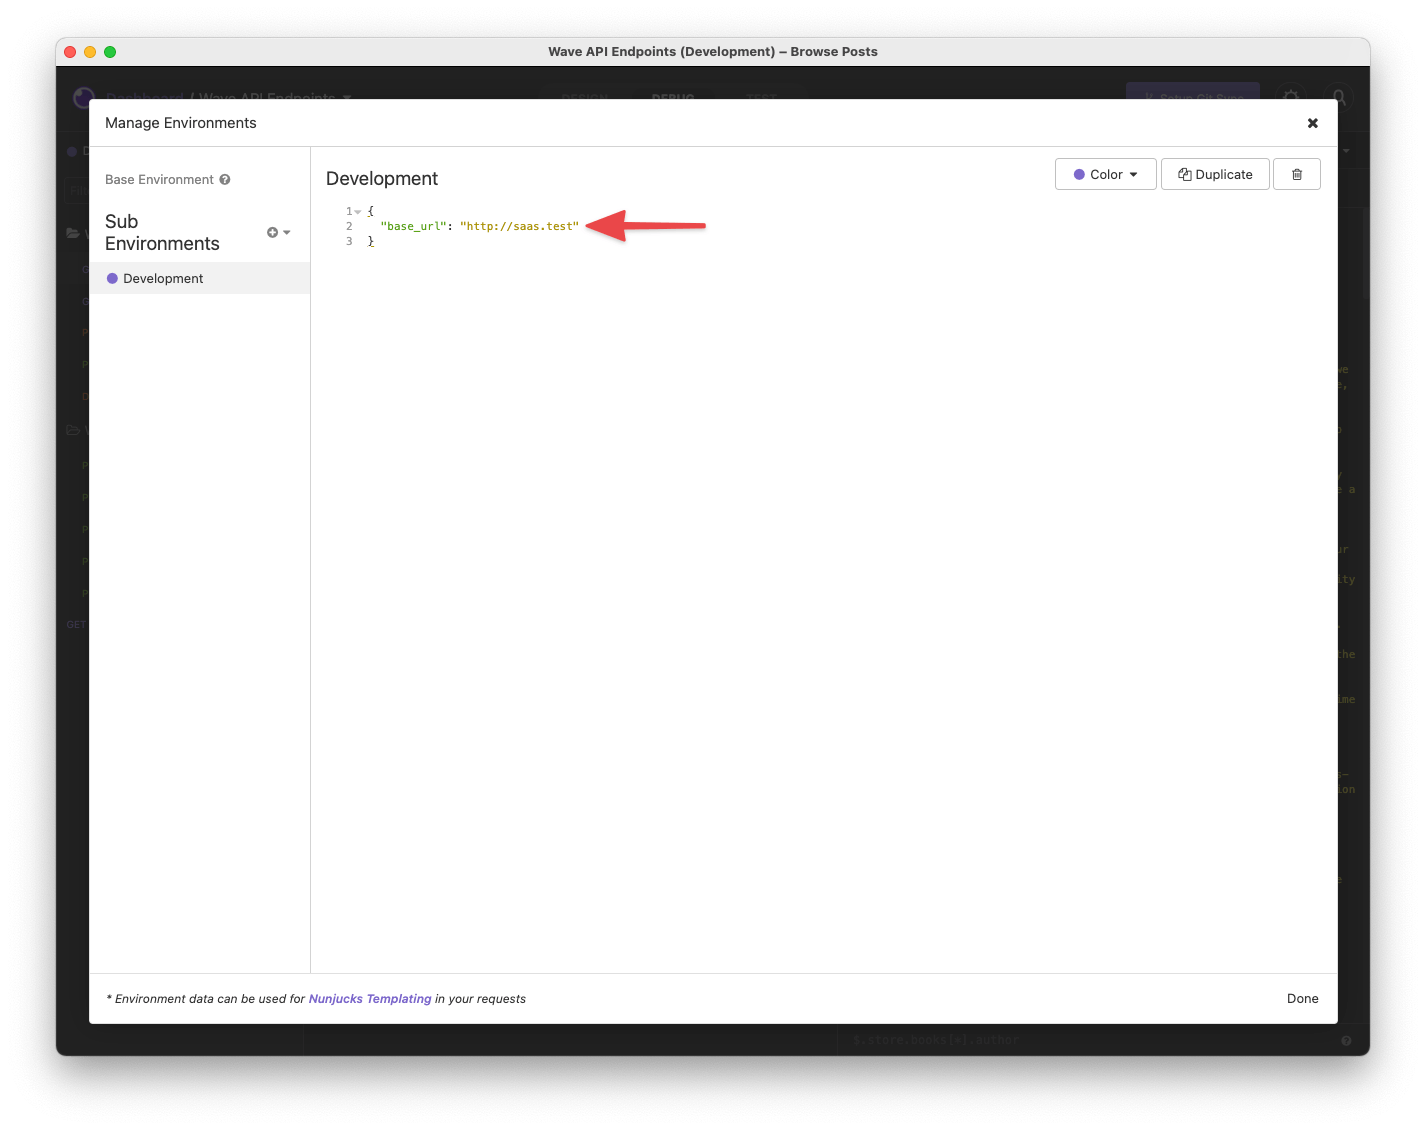
Then, you'll need to change the `base_url` value to your application URL.
|
|
|
|
|
|
|
|
And, now you're ready to test out your API.
|
|
|
|
<a name="registering-via-api"></a>
|
|
### Registering via the API
|
|
|
|
If you are creating an API, you may also wish to allow your users to register. This is simple as well. You can perform a POST request to:
|
|
|
|
```php
|
|
/api/register?name=John Doe&username=jdoe&email=jdoe@gmail.com&password=pass
|
|
```
|
|
|
|
And a new user will be registered and given an Access Token to access data via your API.
|